 Google brings many resources to web sites for little or no cost, and one of these is Google Maps. In the “old days”, many web sites would have a static image of a map to help customers know how to get there. But now, you can help your customers even more with a dynamic map that they can zoom in or out of, get directions from their locations, and more.
There are a lot of benefits to this that can help your bottom line. If you have one or more physical locations that you want customers to visit, this is the best way to help them find their way there. Perhaps you’re a wholesaler or manufacturer, but your site lists retailers who carry your product. Giving visitors a map with the ability for directions for each of those retail locations not only serves the end customer, it benefits your own retailers who are your actual customers. You can even use Google Maps for a do-it-yourself store locator, although that’s a topic for another post.
The rest of this article gets more technical than most, but if you’re a Marketing Professional and not a techy, take away the knowledge that dynamic Google Maps can be incorporated into your site at no cost, aside from the cost of your developer adding a little bit of code. If your developer is uncertain how to do this, point to this article, which goes through the basics.
How To Add Google Maps To Your Site
- Obtain a Google Maps API Key. You can add a basic map to your site without the API Key, but by far the best thing to do is obtain the key and use the maps to their fullest potential. Find excellent information for obtaining the key at the Google Help Center here. What you’re trying to obtain is a long (around 40 characters) alphanumeric string.
- Identify the page you want to add your map to, and where you want it to display. Take note of the width and height in pixels of the space you plan to display your map in on that page.
- Identify the address you want to map out. If you have a single store, obviously you know the address. Or you may have a database of stores, in which case you’ll obtain the addresses from that table. This example talks about one specific address, but the principles can be used for multiple addresses.
- Geocode the address. Again, you can pass a physical address into Google and display the map based on that, but it’s much better to pass in the latitude/longitude of the location, in case your address isn’t quite right or in case street names change in the future, etc. There are two ways to get the latitude/longitude for the address (known as “geocoding”):
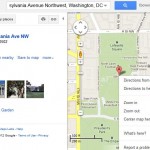
- If you just have one or a couple addresses, you can estimate the latitude/longitude easily by searching for the full address (address, city, state) in Google Maps (maps.google.com). Assuming you entered a valid address, you’ll get your little map marker on the map. Right-click at the point of the marker to get a little context-menu and choose “What’s Here?” from that. The latitude & longitude will appear (in that order) in the Google Maps search bar.
- If you have a lot of addresses, or you need to be ultra-precise, you can use the Google API to get you your latitude/longitude for any number of addresses. To do that, enter the following address into your browser:
http://maps.googleapis.com/maps/api/geocode/xml?address=youraddress&sensor=falseReplace “youraddress” with the address you are looking up, but replace each space with a + sign. So instead of “1600 Pennsylvania Avenue NW, Washington, DC”, you would use “1600+Pennsylvania+Ave+NW,+Washington,+DC”. The full url in this example would be:
http://maps.googleapis.com/maps/api/geocode/xml?address=1600+Pennsylvania+Ave+NW,+Washington,+DC&sensor=false
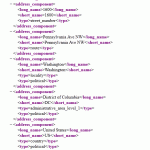
Enter that in to your browser and the response you will get back will be a long string of XML. The latitude/longitude for your address will be in thesection and thesubsection. If you have a large database of addresses, you can write a simple ASP or PHP program to loop through each record, POST the url, and parse the results to obtain the lat/long, and write those back to your table.
- Prepare the map. Okay, so now we have a latitude & longitude for the location we wish to show a map for. And we know where on the page we want to show that map, and how big it should be. Time to do it! Start by placing the following code in to the HEAD section of your page:
<script type="text/javascript" src="http://maps.googleapis.com/maps/api/js?key=yourapikey&sensor=false"></script>
<script type="text/javascript">
function mapinit()  {
   var myOptions = {
      center: new google.maps.LatLng(latitude, longitude),
      zoom: 10,
      mapTypeControl: false,
      mapTypeId: google.maps.MapTypeId.ROADMAP
   };
   var map = new google.maps.Map(document.getElementById("google_map"), myOptions);
   var marker = new google.maps.Marker({
      position: new google.maps.LatLng(latitude, longitude),
      animation: google.maps.Animation.DROP,
      map: map,
      title: "locationname"
   });
}
</script>
You will replace “yourapikey” with your actual long alphanumeric string that you received in Step 1 above. There are also two lines above where you would replace the latitude & longitude with the actual values (or dynamically insert them with PHP or ASP), as well as a real “locationname” near the bottom. All of this JavaScript sets up the map. Now all we have to do is display it.
- Display the map. Wherever you determined you want the map to appear, insert the following line of code:
<div id="google_map" style="width:290px;height:240px;padding:2px;border:3px solid #E2E2E2;"></div>
You would want to replace the width and height with the dimensions you identified in Step 2. You can of course change other components of the styling as well.
Make these additions to your page and the map should show up!
Options
There are of course many ways to customize your map. You can control what kind of map to display (road map, satellite map, etc.), how zoomed in to your location you want the map to start with, whether to include certain controls to let the user change the appearance (such as change the zoom level, change the map type, etc.), and many more. You change all of these in the mapinit() function in the code.For a full list of the configurable options, see the full Google reference here.


Pingback: How To Add A Store Locator That Saves Your Site Money | Web Site Optimizers Blog()